Monday, December 15, 2025

Sparkling Advent Ornaments

Watch this video to see the cutest little handmade advent ornaments made out of sparkly paper. They are easy and intuitive to make. Here you can find the templates to print your own.

Supplies needed: 
sparkly paper (solid colors will work, but won't look like these)
printer
hairspray
large eye needle
thin ribbon
scissors
glue
candy
tissue paper (optional but recommended to wrap the candy in)
ornament hooks  


Thursday, December 19, 2024

Gingerbread Advent Calendar

After being stretched thin, this year's advent calendars had to be a little quicker to make than those of past years. Here's how to do it:

Grab a Christmas village building at the local craft store. There are different styles, they have a light in them and are quite cheap! You just have to get to them before they sell out.
With a circular drill bit, cut a hole in the back about 1.7 inches in diameter. You may want to sand the opening.
Then from a similar piece of wood (buy it at the craft store) cut a larger circle about 2.5 inches in diameter. You may want to sand the edges.
Now you can paint everything brown. Mix baking soda in with the paint before you begin if you want to try a gingerbread texture as seen below.
Attach velcro to the back of the door and house to keep the door on. If your door has a hole in the center from the drill, use a button or crafting brad to cover it up. (I tried a red button I happened to have on hand but the paint wouldn't adhere to it—it didn't adhere to the brad that well either.)
Puff paint can be used for the frosting effect. Though, it's kind of clunky and difficult to get fine details with. Try paint and a brush if you want more detailed control.
Next, wrap 25 little gifts and stuff them into the house. Close it all up and gift it away!
For my advents, I usually include a piece of candy for each person and an age appropriate activity prompt. Here is my list of activities for a young family.


Friday, December 1, 2023

Handmade Advent Calendar


Watch how to make this advent calendar out of crafting tubes and Christmas paper.


Buy candy in bulk and add slips of paper with silly little prompts on them—customize them for age. (For example: For a three year old...What do you think Santa eats for breakfast when he gets back from delivering all the presents?)

An example of another color scheme.


Saturday, December 3, 2022

How to Age Paper with Coffee and Salt

Below is a video on how to age paper using instant coffee and salt. This is the technique I used for the EPIC pirate party we threw last year. The paper shown in this video was used to make the book pictured.
 

Materials:

  • Instant coffee.
  • Baking tray or dish large enough to hold paper.
  • Cardstock (preferable) cream color. (recommended)
  • Table salt.
  • Paper towels and old dish towels (they'll get stained.)

Tips:
  1. The pages don't need much soaking time. If the water is on the hot side—the paper accepts the coffee very quickly. If the water is very hot you will see splotching that you may not like...this normally goes away after the paper dries.
  2. For deckled edges: create the edges before dyeing, not after.
  3. Give yourself room to experiment. No two papers will be exactly alike!


Thursday, November 10, 2022

Dowel Tree Advent Calendar

 
Here's a fun idea to help with the countdown to Christmas day. Try making a simple tree using just a few dowels and hang packets of candy from it. A bonus is that the tree can be disassembled for shipping.

Also included in each packet is a slip of paper with instructions for a very short activity for the family to do. For example: "Family Hug! Wish each other a happy holiday. Now eat your candy!"

These packets each hold a different candy from the other—one for each person—and the kids can easily rip into them since they're made with napkins! 

WHY NAPKINS you ask? First, napkins can be sewn up using a sewing machine, and it's easy to find holiday patters which often include fancy foiling, so why not? Unless you want your advent calendar to last from year to year—which I don't—consider using napkins.

Here's another an alternate example of what the advent tree calendar could look like.

 
Below is a link to a FREE printable PDF with illustrated instructions and a supply list so you can make your own advent tree calendar. I've also included some activity ideas—you can cull from those whichever ones will fit the family you are crafting this advent calendar tree for. I hope you enjoy your crafting time!

Download and print FREE instructions here.

Saturday, November 27, 2021

Alpine Advent Christmas Calendar

Looking for a simple, modern Christmas craft? Here’s a tutorial on how you can make this Alpine Advent Christmas calendar—plus, it comes with free templates for the trees.

The calendar is made up of three sizes of trees. I also recommend using at least three different colors of paper. They could be different greens, as I have used, but they don’t have to be. You could use red, black or even a patterned paper if you wish. 

Supply List:
• Number stamps (or you could use number stickers or paint them by hand.)
• Elmers rubber cement (I prefer this glue because it dries without wrinkling and you can rub off any excess.)
• Colored or patterned paper
• Gold craft paint
• ruler
• Optional: 1 package of .75 inch wooden blocks (to be used on the small trees)
• Optional: 1 package of 1 inch wooden blocks (to be used on the big trees)
• Hot glue gun and sticks
• Scissors or Exacto knife
• Bone folder or other scoring tool
First, print the templates onto your paper. How many trees you print on which color is totally up to you. CLICK OR TAP HERE FOR TREE TEMPLATES.

Next, cut out your trees along the SOLID lines. The dashed lines are for folding.

Then, using your ruler and scoring tool, score along all the dashed lines. (You can, but don’t have to score the tabs)

Now you can fold along all the dashed lines. Fold the paper IN so the dashed lines will be on the inside of the tree. Then you can stamp, paint or stick your number on the middle triangle as seen in the example above. Here, I’ve painted gold paint onto my number stamp and stamped it onto the paper.
Spread rubber cement on the two areas shown in the image. Then stick those two edges together—glue facing glue—to make a triangle shaped cone. Rub any excess glue until it comes off.

You can now fill your trees with candy! I made these to send to a family of four. I wasn’t sure how much candy would fit inside the trees so I took one of the smallest and one of the largest trees to a store with candy bins (this is by FAR the cheapest way to get a variety of candy.) This allowed me to see about how many treats I could fit into one tree and buy accordingly.

Once full, close up your trees by inserting the tabs into the slots.

Using a paint brush—I used a fan brush—swipe some gold paint on all three sides of the top tip of each tree. Now, you could stop here and call it done! But...

If you decided to buy “trunks” you’ll use hot glue to attach a wooden block to the base of each tree. Use the large blocks for the large trees and so forth.
And now you’re done! Your Christmas Tree / Alpine Advent calendar is ready to give away or use yourself! If you missed the link to download the tree templates, click or tap here.


Tuesday, November 16, 2021

Painted Acorns for Autumn Decorations

Do you have hundreds of acorns falling out of your tree every autumn? Do you wonder what you could do with all of that free crafting supply?! I’ve got a couple of natural autumn decoration ideas to help you use up your acorns. A full list of supplies you’ll need can be found at the end of this post.

Yes, this photo was taken on our driveway after we swept up all the nuts that had fallen. There were so many I decided I needed a project to use them. It’s a free and lovely resource!
Rinse the nuts, dry them and then bake. Spread the nuts in a tray lined with foil. Bake at 200°F for two hours. Turn them every 30 minutes.
It’s likely you’ll have to clean each nut by hand. Throw out any that are broken or have holes in them.
Maybe sanding is all you’ll need to do to get a natural color you like from your bowl. Maybe you found a new bowl at the store that needs no alteration. But the wood on my vintage nutcracker bowl was too dark for me, and still dark after sanding. So I bleached it, by applying it with a sponge. It took bleaching three times to get it as light as I wanted. And the natural looking result was pleasing!
This brand does not list color on the can! The copper looking one was the color I ended up liking most and using in my projects. (The sticker price with the barcode on the shelf should list the color.)
Primer: This is optional. I did not use primer on my acorns but will do so in the future. The spray paint surprisingly scrapes off very easily. So if you want to skip primer, handle the nuts with care after they’ve been painted.
Spray the nuts in rows starting with the row closest to you. Then turn the whole thing and start again—keep going until you’ve rotated to and sprayed all four sides.
(Those orange seeds pods are called Putka Pods. Super cute and PERFECT for fall right?)
BONUS PROJECT:
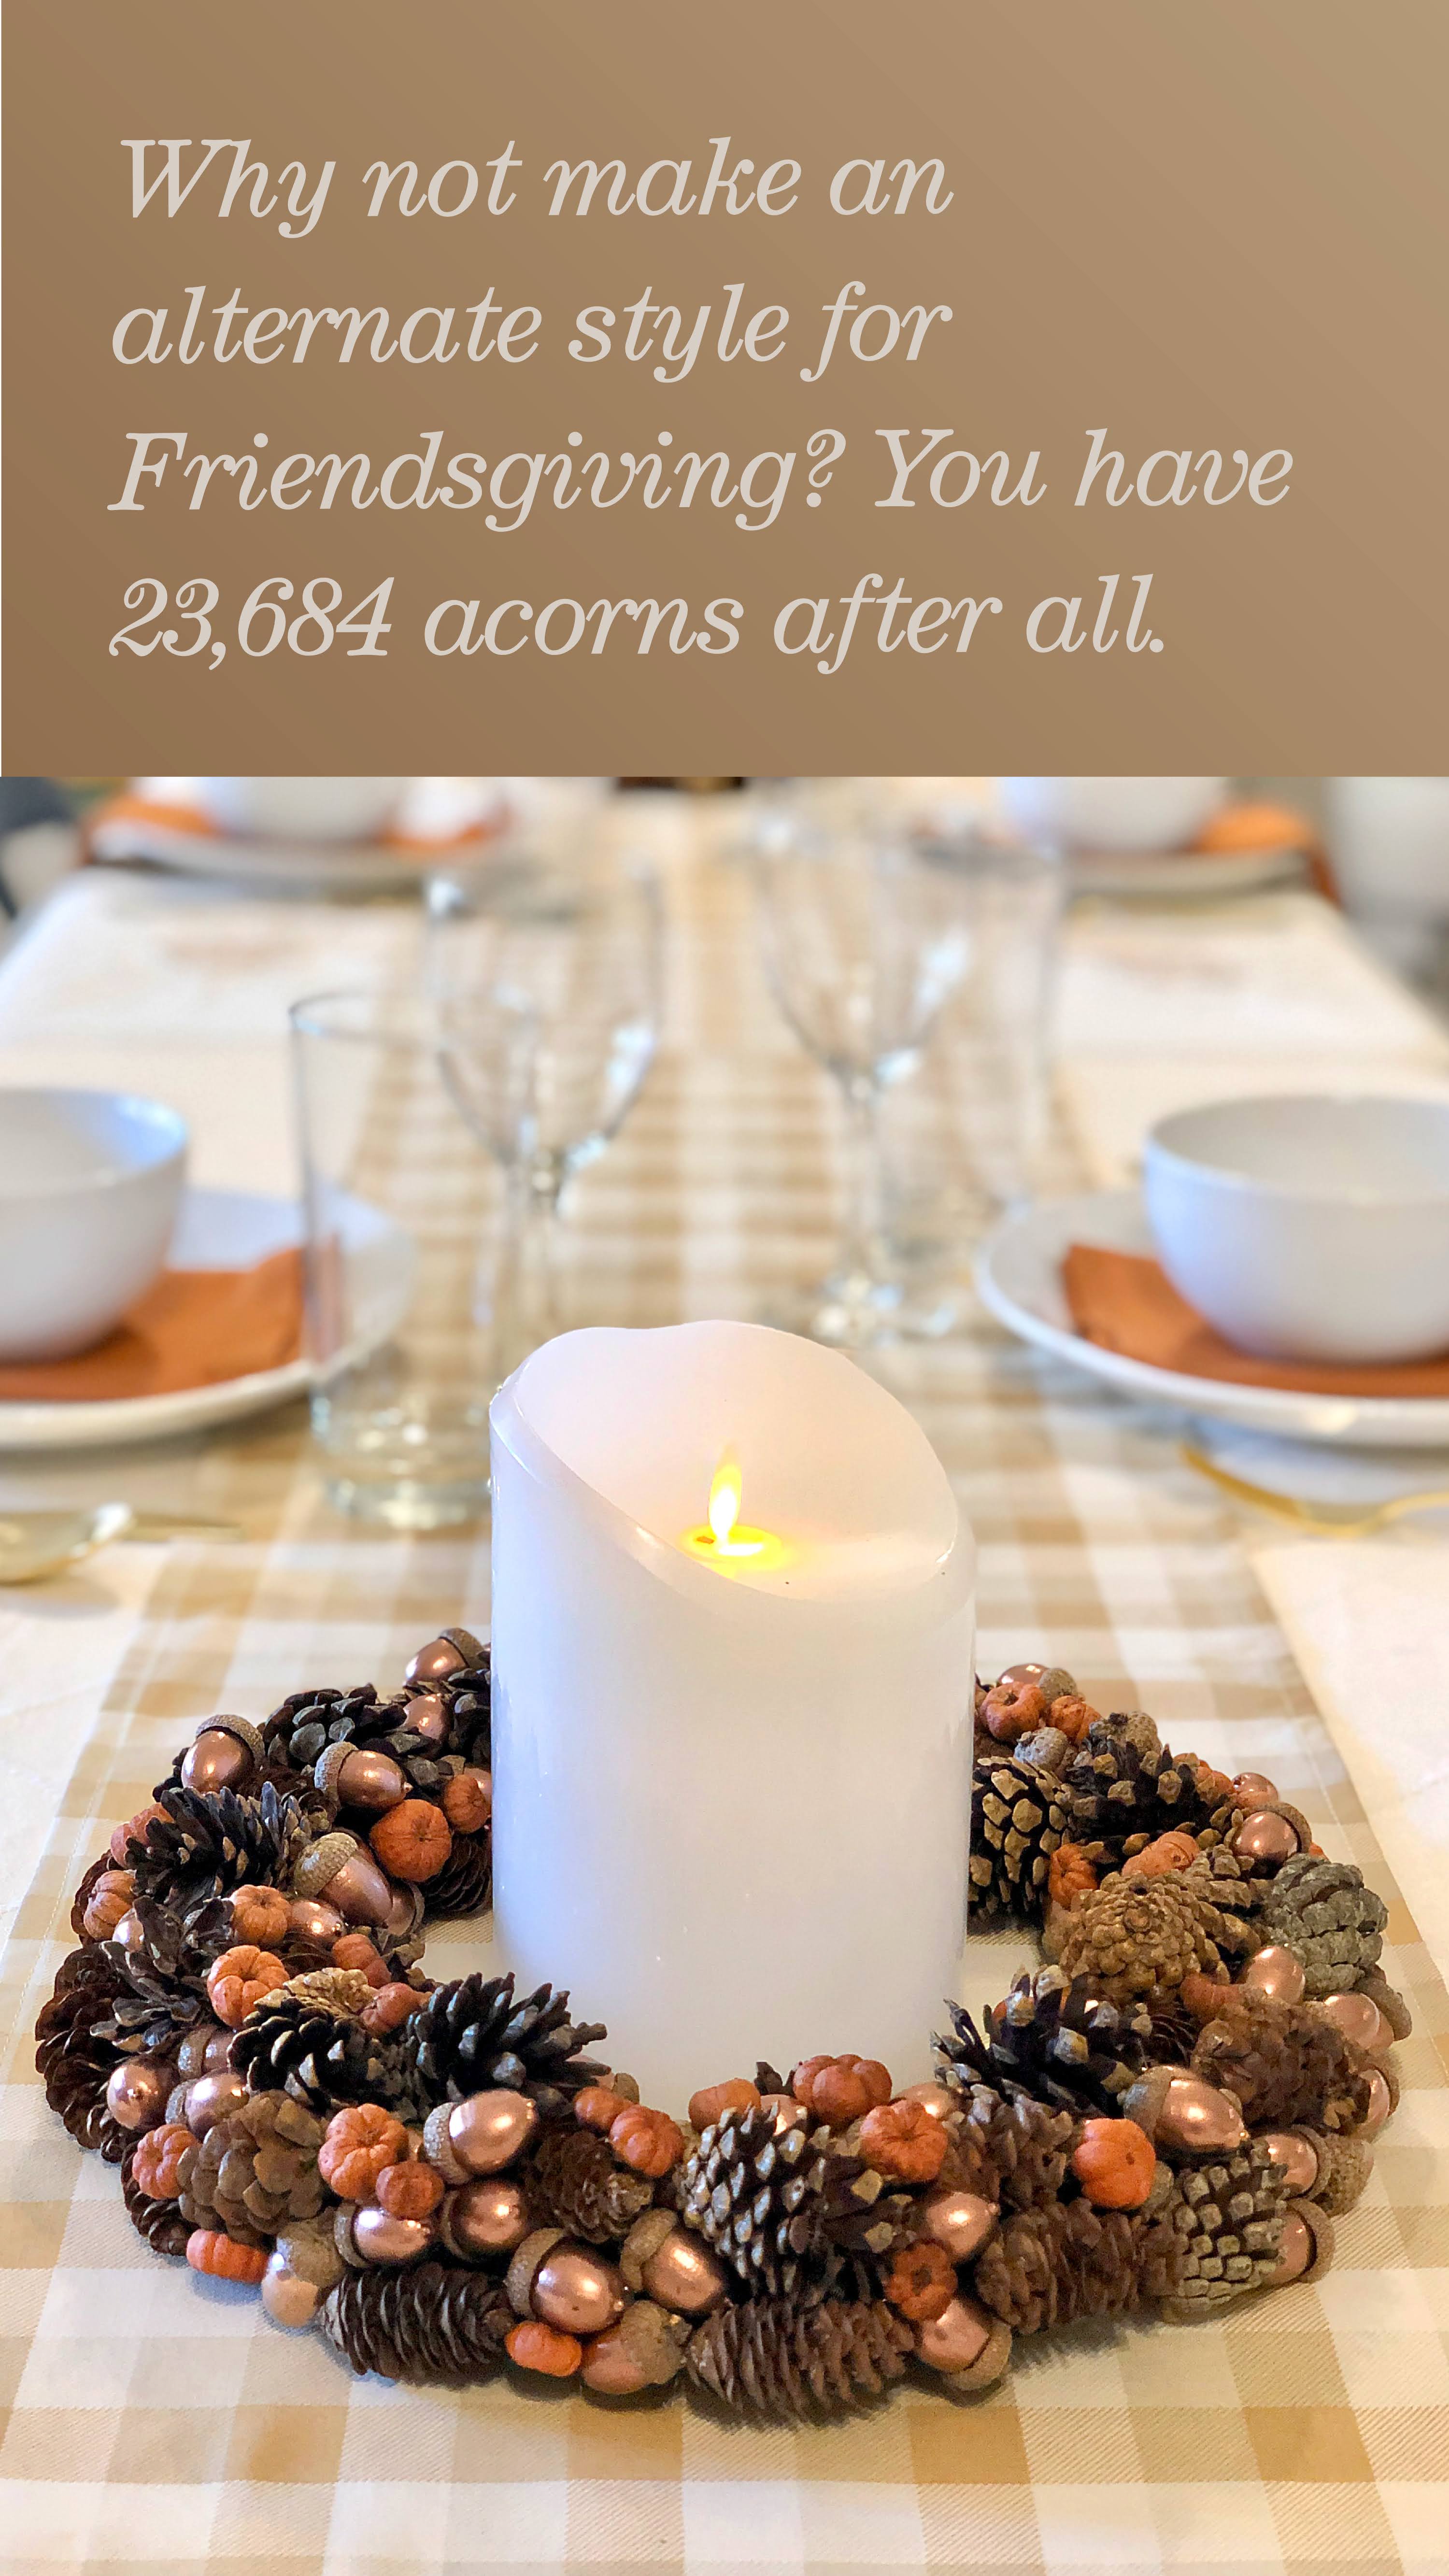
This autumn wreath was made using a wreath form found at the dollar store. Cut it in half like a bagel, then wrap one half with either a dark cloth or ribbon (I recommend black or dark brown) so the green styrofoam doesn’t show. Use hot glue to attach all your ingredients. It’s quite easy, just take your time!

I hope this helped you think of some autumn projects to spice up your home this fall season.

SUPPLIES FOR BOWL CANDLE HOLDER:
Pillar candle
Wooden Bowl
Acorns
Putka pods (about 1-2 oz)
Small pinecones (1 bag)
Bleach (if needed)
Hot glue and gun

SUPPLIES FOR WREATH
Small styrofoam wreath form
Acorns
Putka pods (about 1-2 oz)
Small pinecones (1 bag)
Medium small pinecones (at least 5 but more is better)
Hot glue and gun (this takes a lot of glue)
Dark ribbon or cloth, enough length to wrap around the wreath form
Ribbon for bow and hanging

Sparkling Advent Ornaments

Watch this video to see the cutest little handmade advent ornaments made out of sparkly paper. They are easy and intuitive to make. Here yo...