Showing posts with label Handmade Gifts for Children. Show all posts

Monday, December 15, 2025

Sparkling Advent Ornaments

Watch this video to see the cutest little handmade advent ornaments made out of sparkly paper. They are easy and intuitive to make. Here you can find the templates to print your own.

Supplies needed: 
sparkly paper (solid colors will work, but won't look like these)
printer
hairspray
large eye needle
thin ribbon
scissors
glue
candy
tissue paper (optional but recommended to wrap the candy in)
ornament hooks  


Friday, December 1, 2023

Handmade Advent Calendar


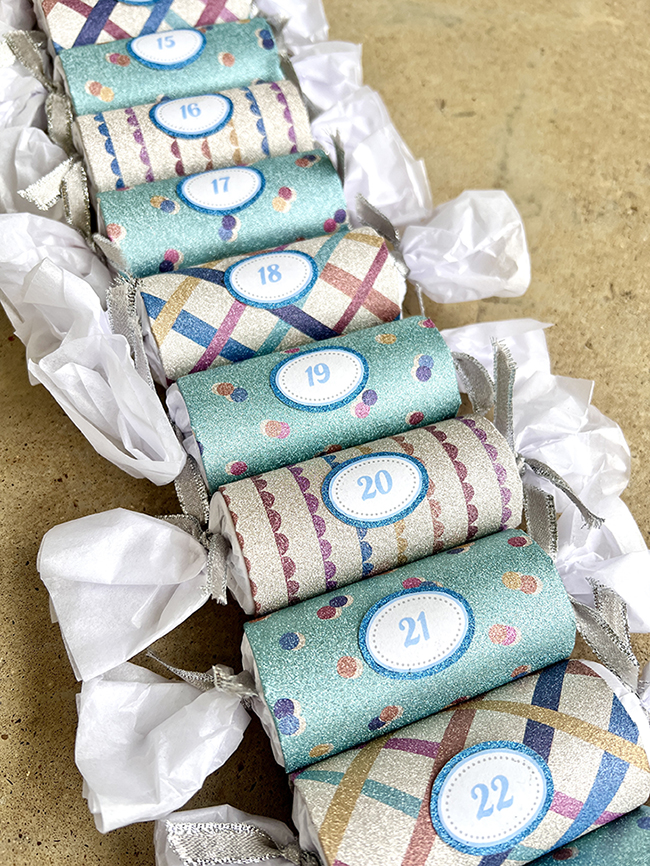
Watch how to make this advent calendar out of crafting tubes and Christmas paper.


Buy candy in bulk and add slips of paper with silly little prompts on them—customize them for age. (For example: For a three year old...What do you think Santa eats for breakfast when he gets back from delivering all the presents?)

An example of another color scheme.


Thursday, June 25, 2020

Little Owl, A Simple Sewing Pattern

This little plush owl is SO CUTE! It’s VERY easy to make and the sewing directions are VERY clear and also FREE! A novice sewer could easily figure out make this soft little friend.

You could make it in any color too! Brown, black, etc. Also, the wings would be a fun way to use up any scraps you may have lying about.
BACK STORY
I used to make and sell these plushies online as a creative outlet (to get me off the computer, I’m a graphic designer by day.) But that particular business has run its course so I wanted to offer the patterns to you for free. Waste not right?

CLICK HERE for the free pdf pattern.
For more free sewing patterns CLICK HERE.

Saturday, October 19, 2013

Make your own Batman Mask

Our youth group made these masks to add to care packages for the Ronald MacDonald House. The mask is quite simple and you will find yourself making more than one just to give away. Might as well!

Below is the pattern. Click on the image below to enlarge to fit on a 8.5 x 11 in sheet and print.

Cheap Cat Ears

Whip these up in about 30 minutes. This cat ear headband was designed so our youth group could make several of them to add to care packages we are delivering to families at the Ronald McDonald House. They are VERY easy and VERY cheap, and little girls will LOVE them.

Big girls might like them too :)

Click on the Directions below and print them off.
Click on the pattern below and print it off (at full size it should be 8.5 x 11)

Note: you do not need all the ears from the pattern. Just one big ear and one small one. I've put more on a page just in case you decide to have a cat making party and want more patterns per sheet.

Supplies:
Headbands—these were under $1.00 for three at Walmart)
One sheet of black and colored felt—each under $1.00
Hot Glue
Scissors

Saturday, January 19, 2013

Magic Pixie Dust

Last year, I gave my nieces a Fairy Portal. So Tinkerbell has been a frequent visitor to their house. I decided to ask Tinkerbell if she could collect some pixie dust so that I could give it as a gift for Christmas. The dust arrived in a cute little pouch with a tiny note from Tinkerbell describing how the magic works. 

"Sprinkle a little bit on your food and when you eat it, the magic will start working. Each color will do something different. One will help you to be brave, another smart, another happy, and lastly one to help you be a good listener. But use it wisely—it takes a long, long, long time to collect this much pixie dust because as you know the fairies receive only a cup at a time."


If you'd like to make your own, purchase sugar sprinkles and decorate the container with just about anything. Flowers, fabric, lace etc. Put it in a pouch or box that you decorate (or buy), don't forget the note from Tinkerbell and you've got a fun little, handmade gift.
If you're interested in a one-of-a-kind fairy portal, head on over to Etsy and visit Kim Detmers at Clayworks. She is so very sweet, does excellent work and her portals come well packaged with instructions.

Monday, November 12, 2012

Rapunzel Hair Tutorial

This Rapunzel Hair was a HIT with my niece last Christmas. I am told it is STILL a favorite around the house. You'll probably want a couple of days to work on it, but it's rather easy and well worth the effort. 
SUPPLIES: Two LARGE rolls of yarn • fabric scissors • three rolls of ribbon • three hair ties • hot glue and gun • toothpick • fabric glue • hydrangea blossom • two hair flowers.


Step One: Do not exercise today. Instead roll out three bunches of yarn strands—using up all of your yarn. My groups each had about 52+ strands in each. Length doesn't matter, you choose. Just remember it's about 1/3 shorter when it's braided. (Mine were about 3-ish yards.) Take breaks when needed! This counts as exercise—believe me, you'll feel it.

Step Two: Roll out a length of ribbon across each strand. 
Step Three: With some extra yarn, cut short lengths and loosely tie around the groups of yarn...about every  foot or so. This will keep things from tangling while you are braiding.
Step Four: gather the groups into one at the end and tie off with a hair tie. Begin braiding as tight as you can. Make sure the ribbons stays on top of the strands as you braid. Tip: It helps to "pinch" the end of the braid between your crossed legs.
Braiding tips: As you braid, comb through the immediate section with your fingers to keep the plates of the braid looking nice. You will be moving the long strands back and forth across your lap. Admittedly, this part does get tedious...so take lots of breaks to sneak some cookie dough.

Okay, I will answer your question: those are "knee pads" (tape) on my knees. I taped them up to keep from wearing holes in my jeans as I crawled back and forth laying out the yarn.
Step Five: When you get close to the end, tie it off with another hair tie. Your ends should look something like this, with one long and one short.
Step Six: Using your hot glue, glue all around both hair ties. I mean it. Really get it good. Make sure some of it touches the yarn too. We don't want the kids to slide the hair tie off.
Step Seven: Measure your kiddo's head and make a loop that same size—measuring the INSIDE of the loop—and put the short end in the back. Tie this off and glue the bleep out of it again. You may also want to put glue where the braids overlap for extra support.
Step Eight: Tie a ribbon around it to hide the glue and make a bow. Insert the hair flowers to further hide the end of the braid. (The clips can be removed before washing.) And tie a ribbon around the bottom of the braid as well.
Step Nine: Using a little fabric glue and a toothpick, apply a line of glue along the clipped end of the ribbons. This will keep them from fraying.
Step Ten: Clip the little flowers off the hydrangea stem. Use hot glue along the stamen on the back and a few drops of the back of the petals. Push the flower into the braid. Place the flowers randomly along the braid, including the loop. No swearing when you burn yourself.


You're done! Step back and admire your work. I promise, this braid is going to be played with A LOT, your little one with LOVE it. (Update: it’s 2020, and there are now THREE kids in the house, the braid has survived and is still getting used!)

Care: Hand wash recommended...however, a front load wash on gentle would probably be ok. Use cold water. Air dry...DO NOT put in dryer.

Sparkling Advent Ornaments

Watch this video to see the cutest little handmade advent ornaments made out of sparkly paper. They are easy and intuitive to make. Here yo...