Showing posts with label Handmade Gift Ideas. Show all posts

Thursday, December 19, 2024

Gingerbread Advent Calendar

After being stretched thin, this year's advent calendars had to be a little quicker to make than those of past years. Here's how to do it:

Grab a Christmas village building at the local craft store. There are different styles, they have a light in them and are quite cheap! You just have to get to them before they sell out.
With a circular drill bit, cut a hole in the back about 1.7 inches in diameter. You may want to sand the opening.
Then from a similar piece of wood (buy it at the craft store) cut a larger circle about 2.5 inches in diameter. You may want to sand the edges.
Now you can paint everything brown. Mix baking soda in with the paint before you begin if you want to try a gingerbread texture as seen below.
Attach velcro to the back of the door and house to keep the door on. If your door has a hole in the center from the drill, use a button or crafting brad to cover it up. (I tried a red button I happened to have on hand but the paint wouldn't adhere to it—it didn't adhere to the brad that well either.)
Puff paint can be used for the frosting effect. Though, it's kind of clunky and difficult to get fine details with. Try paint and a brush if you want more detailed control.
Next, wrap 25 little gifts and stuff them into the house. Close it all up and gift it away!
For my advents, I usually include a piece of candy for each person and an age appropriate activity prompt. Here is my list of activities for a young family.


Tuesday, November 16, 2021

Painted Acorns for Autumn Decorations

Do you have hundreds of acorns falling out of your tree every autumn? Do you wonder what you could do with all of that free crafting supply?! I’ve got a couple of natural autumn decoration ideas to help you use up your acorns. A full list of supplies you’ll need can be found at the end of this post.

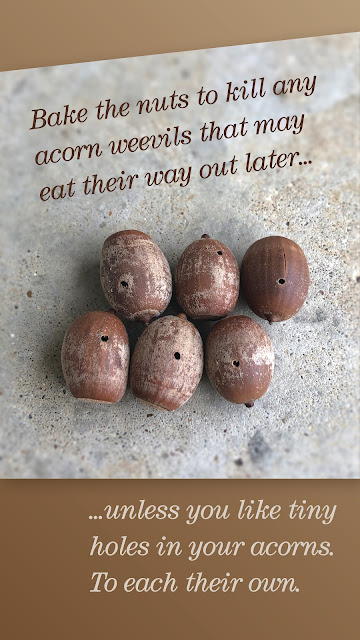
Yes, this photo was taken on our driveway after we swept up all the nuts that had fallen. There were so many I decided I needed a project to use them. It’s a free and lovely resource!
Rinse the nuts, dry them and then bake. Spread the nuts in a tray lined with foil. Bake at 200°F for two hours. Turn them every 30 minutes.
It’s likely you’ll have to clean each nut by hand. Throw out any that are broken or have holes in them.
Maybe sanding is all you’ll need to do to get a natural color you like from your bowl. Maybe you found a new bowl at the store that needs no alteration. But the wood on my vintage nutcracker bowl was too dark for me, and still dark after sanding. So I bleached it, by applying it with a sponge. It took bleaching three times to get it as light as I wanted. And the natural looking result was pleasing!
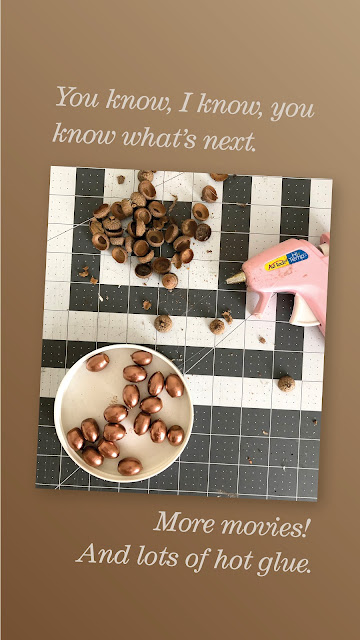
This brand does not list color on the can! The copper looking one was the color I ended up liking most and using in my projects. (The sticker price with the barcode on the shelf should list the color.)
Primer: This is optional. I did not use primer on my acorns but will do so in the future. The spray paint surprisingly scrapes off very easily. So if you want to skip primer, handle the nuts with care after they’ve been painted.
Spray the nuts in rows starting with the row closest to you. Then turn the whole thing and start again—keep going until you’ve rotated to and sprayed all four sides.
(Those orange seeds pods are called Putka Pods. Super cute and PERFECT for fall right?)
BONUS PROJECT:
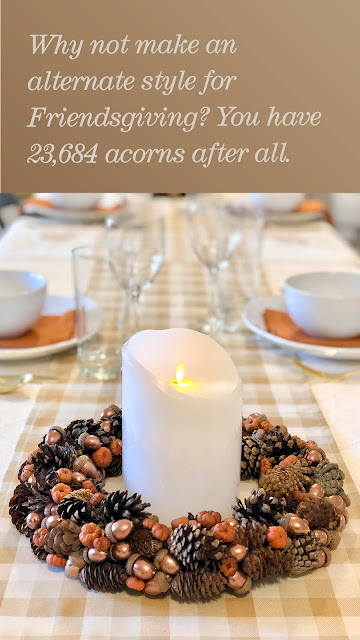
This autumn wreath was made using a wreath form found at the dollar store. Cut it in half like a bagel, then wrap one half with either a dark cloth or ribbon (I recommend black or dark brown) so the green styrofoam doesn’t show. Use hot glue to attach all your ingredients. It’s quite easy, just take your time!

I hope this helped you think of some autumn projects to spice up your home this fall season.

SUPPLIES FOR BOWL CANDLE HOLDER:
Pillar candle
Wooden Bowl
Acorns
Putka pods (about 1-2 oz)
Small pinecones (1 bag)
Bleach (if needed)
Hot glue and gun

SUPPLIES FOR WREATH
Small styrofoam wreath form
Acorns
Putka pods (about 1-2 oz)
Small pinecones (1 bag)
Medium small pinecones (at least 5 but more is better)
Hot glue and gun (this takes a lot of glue)
Dark ribbon or cloth, enough length to wrap around the wreath form
Ribbon for bow and hanging

Wednesday, November 11, 2020

Cute and Easy DIY Holiday Advent Calendar

Cute and Easy DIY Advent Calendar

This advent calendar craft project works well if you have scraps of pretty Christmas paper that need to be used up. Or if you just want a reason to purchase a pad of colorful holiday patterned paper, this is an easy, DIY holiday craft project to fill your afternoon. (Or get together with your friends and have a craft night!)

You will need the following supplies:


• Twenty-five 2x2x2 inch party favor boxes. (I found mine here, in a pack of 50—some for you AND a friend—and there are color options if you don’t prefer the Kraft color.) 

• Elmers or similar glue.

• Rubber cement (not necessary but I prefer to use it when I want to avoid wrinkling.)

• Clear wrapping tape or other.

• Scissors and/or Exacto knife.

• Fancy bakers twine (can be found at most craft stores.)

• 5 different sheets of pretty holiday patterned paper.

• Numbers on squares printed on cardstock. Click or tap here for the free printable file.

• Black cardstock (you don’t need much, a scrap piece will do.)

• Something to put in the boxes.

1. Print the sheet with numbers on cardstock and cut them out. Here is the free printable file. (You’ll notice there are two pages to print. The second, is for step 2.)

2. Print the sheet with the cut marks on the back of all your patterned paper. Cut them out. If you have five different patterns, you’ll need to cut five squares out of each.

3. Lay out all your patterned squares in whatever arrangement is most pleasing to you (as seen above) and start glueing the numbers to them. This is where I like to use the rubber cement. 

TIP: If you brush rubber cement on BOTH surfaces that will be sticking to one another, let them dry, and then put them together, you won’t get any wrinkling. AND you can simply rub off any excess making it easy to get each edge and each corner totally glued down.

4. Now you can glue all your squares to the lid of each box. Again, I used rubber cement for this part.

5. Cut a 1 inch strip of your black paper. Then slice the strip into “tabs” as seen below, a little larger than 1/4 of an inch wide. You could skip this part, but I don’t recommend it. The tabs help get the lids open because they interlock with the side flaps making them difficult to open when the advent calendar is completely assembled.

6. Using Elmers glue, attach each little black tab to the lip of the lid as seen above. I used the white glue here because it has a strong bond once dry.

7. Now you need to start attaching these little gift boxes to one another. You'll find that using both glue and tape will give you the most secure, tight fit. Note: don’t use tape on the joints that will be showing on the outer edge of the final project. I also found it helpful to tape the bottoms of the boxes together too. You can use packing tape for this to get FULL coverage.

8. Wrap your fancy bakers twine around the whole thing. I recommend looping it around at least five times for a more pleasing look. IMPORTANT: If you're filling the advent calendar boxes with light weight items you can attach something as shown in the image below so it can be hung. 

Please note: My finished piece held 2 pounds of candy and when I lifted it by the hang string, the corner boxes couldn’t hold the weight. But it still looks great laid down or leaned up against the wall.


9. Now it’s time to fill your advent calendar with prizes, things to do, little notes, or candy...whatever! Then tuck those lids securely in.

If you choose to go the candy route...I highly recommend going to a bin store like WinCo or Food4Less etc. It’s an inexpensive option, and that way each box can have something different to try.

That’s it! You’re done. It’s really so simple and will turn out cute. It’s a good holiday craft project!


Tuesday, December 16, 2014

Fa la la!

Went a little crazy this year and hand made ALL my Christmas wrapping. I used some Higgins® Black Magic® Ink (watered down for a gray color) and Ikea Måla paper (from a roll) and started scribing with a paintbrush Fa la la on long swaths of the paper.
I was just going to wrap with it, but then there was enough left from which to make gift bags. (As seen on the left.) I made TWELVE of them. TWELVE. A little crazy maybe should be changed to a lot crazy.
And THEN I was having so much fun I scribbled MORE Fa la la's on some black paper with watered down white paint, to make boxes to hold some decidedly DELICIOUS and addictive Nutella truffles with Frangelico from MyBakingAddiction


Using eyelets in the lid, I strung black ribbon through it to create a loop pull. It made the perfect little container for the truffles. What a great presentation. I used this tutorial to make the boxes—which I love because this method doesn't leave any crease marks in visible areas of the box.
(There's some yummy cranberry orange bread from here  wrapped up in the photo below.) Isn't everything so lovely?
Now, you can go make your own wrapping paper!

Wednesday, December 12, 2012

Cookie Tubs with Printed Ingredient Cards

We've all seen the cute gift idea with mason jars and ingredients for cookies...but mason jars are expensive! So instead, purchase plastic containers (4 for about 2-3 bucks) and use those instead.

Here, I've created a tag with a photo I took of the cookies, and on the back I put the directions. Then punched a hole in it, tied it with ribbon and delivered! So next time you make your favorite cookies—don't forget to take a picture. You never know when you might need it.

Gingerbread Advent Calendar

After being stretched thin, this year's advent calendars had to be a little quicker to make than those of past years. Here's how to ...