Looking for a simple, modern Christmas craft? Here’s a tutorial on how you can make this Alpine Advent Christmas calendar—plus, it comes with free templates for the trees.

The calendar is made up of three sizes of trees. I also recommend using at least three different colors of paper. They could be different greens, as I have used, but they don’t have to be. You could use red, black or even a patterned paper if you wish.

• Number stamps (or you could use number stickers or paint them by hand.)
• Elmers rubber cement (I prefer this glue because it dries without wrinkling and you can rub off any excess.)
• Colored or patterned paper
• Gold craft paint
• ruler
• Optional: 1 package of .75 inch wooden blocks (to be used on the small trees)
• Optional: 1 package of 1 inch wooden blocks (to be used on the big trees)
• Hot glue gun and sticks
• Scissors or Exacto knife
• Bone folder or other scoring tool


 Now you can fold along all the dashed lines. Fold the paper IN so the dashed lines will be on the inside of the tree. Then you can stamp, paint or stick your number on the middle triangle as seen in the example above. Here, I’ve painted gold paint onto my number stamp and stamped it onto the paper.


 If you decided to buy “trunks” you’ll use hot glue to attach a wooden block to the base of each tree. Use the large blocks for the large trees and so forth.
 And now you’re done! Your Christmas Tree / Alpine Advent calendar is ready to give away or use yourself! If you missed the link to download the tree templates, click or tap here.


First, print the templates onto your paper. How many trees you print on which color is totally up to you. CLICK OR TAP HERE FOR TREE TEMPLATES.

Next, cut out your trees along the SOLID lines. The dashed lines are for folding.

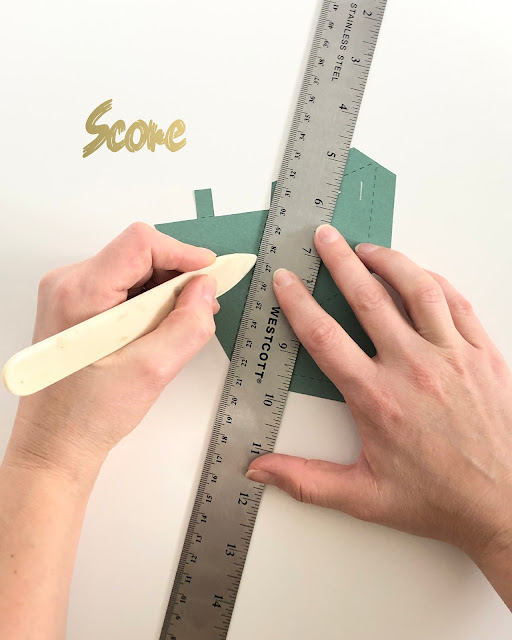
Then, using your ruler and scoring tool, score along all the dashed lines. (You can, but don’t have to score the tabs)


Spread rubber cement on the two areas shown in the image. Then stick those two edges together—glue facing glue—to make a triangle shaped cone. Rub any excess glue until it comes off.

You can now fill your trees with candy! I made these to send to a family of four. I wasn’t sure how much candy would fit inside the trees so I took one of the smallest and one of the largest trees to a store with candy bins (this is by FAR the cheapest way to get a variety of candy.) This allowed me to see about how many treats I could fit into one tree and buy accordingly.

Once full, close up your trees by inserting the tabs into the slots.

Using a paint brush—I used a fan brush—swipe some gold paint on all three sides of the top tip of each tree. Now, you could stop here and call it done! But...